Tuesday 11 October 2011

Make it a feature...

Decorating over a fireplace ultimately sets the mood for the room and adds a welcoming touch.

We wanted the fireplace to be the focal point of the living room  - a cozy spot to unwind after a long day but also be an ideal space to showcase personal objects and quirky finds. A stage for displaying favorite pieces of artwork and antiques.

A vintage wooden set square is a quirky talking point

An antique meter stick, simple floral display and nostalgic family photo
When we found this mirror in the antique shop, it was a horrible gold colour! It cost £9!

 I had always thought that animal heads above a mantlepiece was a real statement but being an animal lover, a real head just wasn't an option for us...

This is where paper mache animals heads come in...

I discovered these beautiful heads in a book. They are hand made to order by The Stealthy Rabbit. I fell in love with their quirkiness and real life details. http://thestealthyrabbit.blogspot.com/

But on our tight budget we couldn't afford £200...not just yet anyway....


So after much searching, I managed to locate some cheaper heads which are made in Haiti and sold by anthropologie.eu/en/uk/
 We decided on the Savannah Story Bust, Gazelle which has certainly been a talking point of visitors so far...
Layers of re purposed cement bags are covered with vintage French book pages to create this regal, papier mache animal head
 The mantlepiece so far...
Next...to find a clock and some art!

Sage in your cooking - Sage on your walls...

We have also been busy decorating the kitchen and have had our fair share of dramas along the way..but I'm happy to report its beginning to take shape!

Before...


After...


Water and Fire...the worst and best of natural resources!

First there was water...

The time has arrived!...we have a beautiful, real fire!! The day we had it fitted, which happened to be Ste`s birthday, also happened to be the day that the insurance people were coming over too (more about that later!)

It was like appearing in an episode of changing rooms..I wonder which one of us was Laurence Llewelyn Bowen!? Ste and I were flitting from one person to the next, one situation to the next!

Before we bask in the glorious glow of the stove, I will tell the story of the insurance visits! On the Tuesday night, I was finishing brushing my teeth when the cat jumped up at the tap and started to drink...so I left it on...not thinking....with the plug in! Then we slept

At 7am in the morning I was awoken by Ste, "Jo. we`ve had a disaster!"  So I followed him to the downstairs front room...

It really was like it was raining indoors! The water had ruined our hoover, sander and drill (among other things!) - all of the things that we have been needing so much lately! As well as soaking the ceiling, floors and sofa.

So back to the chaos of the fire fitting day...we had two lovely guys "the chimney pot men" fitting the fire in the back room and two different insurance companies, who began to argue about whether the front room ceiling needs replacing or not, in the front room!

There is a dehumidifier in the room right now trying to dry everything out! 

Then there was Fire...

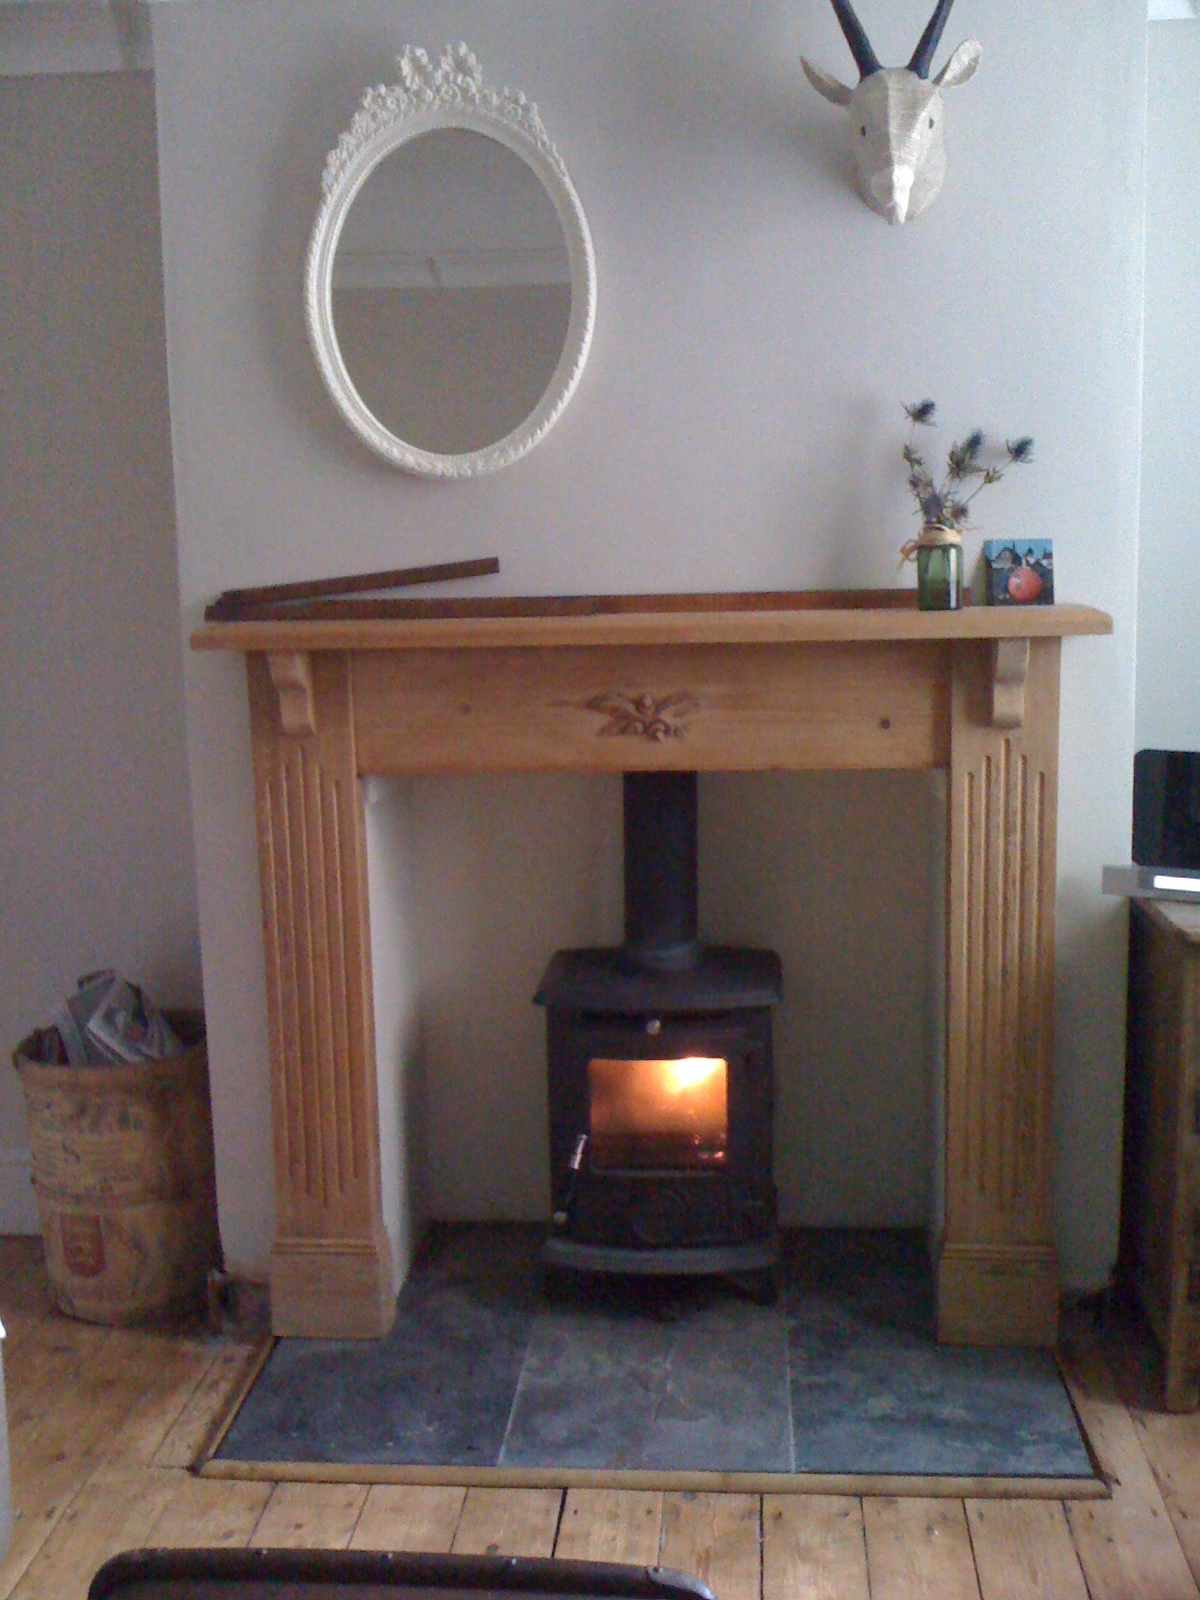
So...here it is! After months and months of waiting! We are delighted with our decision to have a real stove fitted, it totally transforms the room - sure does make a house into a home!

The stove is called a Little Wenlock and fits perfectly into the space!

The antique Jersey potato container we store our wood in.


Now our house really is a home!

Tuesday 20 September 2011

Light it up!

After we had purchased a delicate period reproduction light shade for the hall from B&Q (1/2 Bola Counter Glass Shade Acid) - and I had forgotten it was in the bag, thrown it down on the table and smashed it, I was relieved when we spotted a pretty emerald green glass shade in the antiques shop for £7.

The shape, material and deep colour add a splash of interest in the hall, with its otherwise neutral decoration, which makes it a classy addition.
Adding a hint of colour to the simple, natural colour scheme.


 We spent some time deciding what kind of style of lampshade would suit the living room. We were open to any idea, from wicker to enamel.   


I am quite a fan of the enamel light shade and loved the idea of being able to create a mixture of styles within the room - a little rustic, a little country twee with a hint of industrial thrown in there with the light shade.

However, we decided that the feel of the room called for a much more delicate shade and in the end choose a cream chandelier style light. Which really does look lovely in the room!


 The lampshade cost less than £30 from B&Q. So its been great when people have mistaken it for a Laura Ashley, as their equivalent costs £200.

To complete the look we are thinking of installing a simple ceiling rose to complete the look.


Future project...

I made a discovery on a favourite website of mine ( http://www.etsy.com/ - a sort of eBay for artists and traders) of a quirky idea making lamp shades out of vintage glass jars.


The most popular jar to use are antique American Ball Mason canning jars. These are unfortunately scarcely come by in the UK.

Watch this space for our own UK version...

The vintage Kilner jars we purchased in Malvern


Friday 16 September 2011

The splendour of vintage cutlery and crockery

In June this year, to celebrate my birthday, we took a trip on the Seven Valley Railway. We took the train from the quaint Kidderminster station through the beautiful countryside, stopping at handsome little stations on the journey to our destination Bridgenorth.
A sign inside the gents toilets at Kidderminster station

Kidderminster station


We could have done with one of these for a coffee table!

Once we had arrived in Bridgenorth we headed to our favourite antiques shop and its there that Ste spotted some vintage cutlery bunched up and tied with ribbons. Ste began to reminisces of times gone by in his childhood - layering thick spreads with the same cream handled style butter knife.

The cutlery - six starter folks, six forks, six knives and six spoons were carefully wrapped up in brown paper and placed into a paper bag. We had lunch and then returned for our (heavy!) purchase, just in time to catch the train home!

We now use the cutlery daily - we wouldn't want to preserve these wonderfully homely pieces to 'best'. The material, weight, style and history of them means to use them every day just makes every mealtime feel that little bit more extra special.


They go perfectly with our crockery:

The only draw back of the set was that it came minus teaspoons! Now, we drink a lot of tea and so these were a necessity for us! However, a few weeks later during a trip to the historic town of Ludlow we struck lucky when we found some quirky apostle teaspoons on the flea market. A set of 6 for £5.


Thursday 15 September 2011

A little tender love and care...

...Is all a little wooden cabinet we found slung outside a charity shop needed!

We had gone to the charity shop to drop off some old books and clothes of mine when outside in the drizzle was this poor cabinet looking sorry for itself, covered in dark varnish, dust and bird poo!


There was a very friendly woman who was helping us take all our donations in from the car and I asked her how much it was. "I`ll get the manager!" she shouted. About five minutes later a woman in her late 50s with a tight perm and glasses on a string appeared out of the shop. Without acknowledging me, she began to study the cabinet closely, pulling open drawers and twisting knobs. She rubbed her chin and stepped back-  I though all of this was a bad sign - until suddenly she looked at me and inquired..."£5?!" with a look on her face to say "is that too much?"

Well as you've probably guessed, we took the cabinet!


When we got it home we got straight to work together rubbing in nitromors varnish remover. It took a few coats and lots of rubbing! Then, once it had dried we sanded with sand paper and Ste finished it off with the small electric sander (the good old one used for the floors!) - As I cannot use it without getting serious pins and needles in my hands!

We then applied a couple of good coats of bees wax and here is the finished cabinet (which fits perfectly in the space next to the fire)...

Breathing new life into unloved objects